Shooting and Receiving
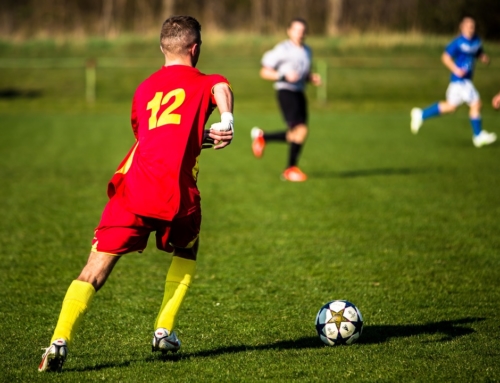
Shooting is a difficult skill that requires lots of practice. There are many parts of the body that play a roll in good shooting. The video below will help with understanding those basics. Like batting, golf, or shooting a puck, shooting in soccer requires key body mechanics to shoot with power and accuracy. This is an area of training where players often get discouraged. They want the ball to travel hard and fast and with accuracy, but often it misses, trickles in, or they flop it completely. This is a week when your encouragement will go a long way. Find the minute improvements your players make and compliment them. Help them to see the progress they are making and encourage them not to give up.
Technique: Online Soccer Academy has a great video explaining how to shoot a ball with power. Please like or subscribe if you find his videos helpful.
Additional Points on Shooting:
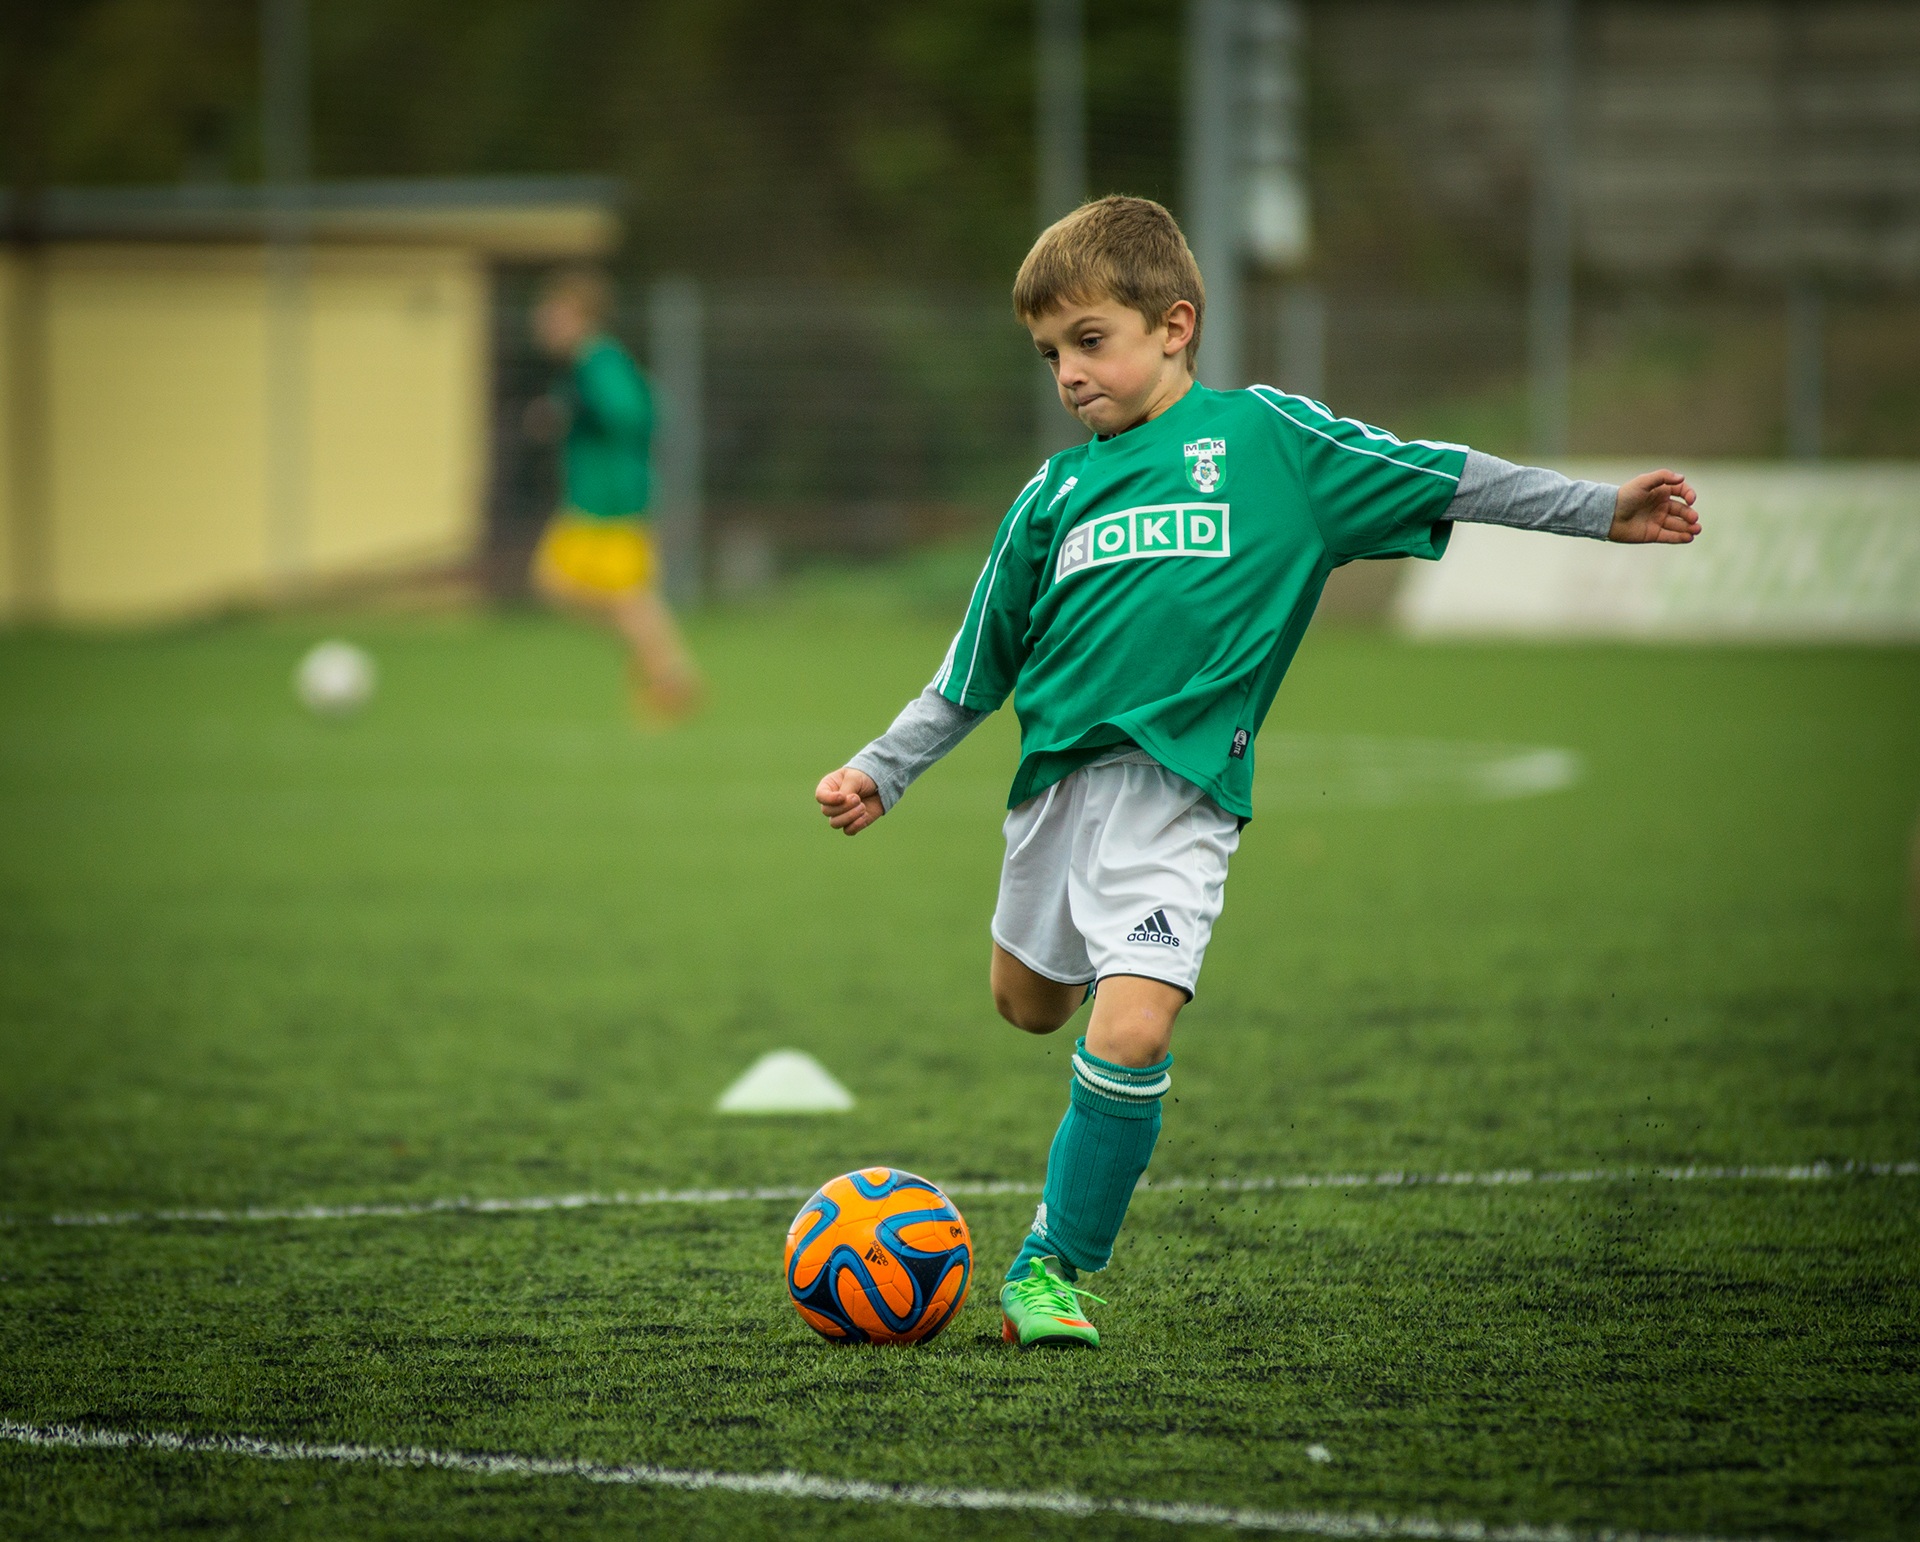
- Young shooters should look at the spot where they want the ball to go and point their kicking foot at the target in follow through.
- When close to the goal pass the ball into the goal. There is no need to shoot hard when the ball is so close to goal.
- Keep the shoulders forward, head down, and eyes on the ball when kicking. If a player leans backward the ball will most likely go over the goal. If they stop looking at the ball they may hit their foot on the ground.
Drills and Games: (We will not be shooting at the larger nets in our games, but you are welcome to use them during this week’s practices) Teach them to “aim small” and “go for the corners”. If you use lines please separate players in the lines with cones.
Begin with teaching the technique – You may want to use a high school player to help demonstrate the proper technique
- Angled approach – about three steps behind the ball and one step to the left (if right footed). Left footed players (3 steps behind the ball and 1 step to the right).
- Plant foot next to the ball – their non-kicking foot should be next to the ball and no closer than 2 fists distance.
- Eyes on the ball and head down through the whole kick. (They will be tempted to look at their shot and will pick their head up early.)
- Shoulders square to the target.
- Locked ankle with kicking foot. (foot pointed straight out – toes toward the ground through the whole kick).
- Follow through by landing on the kicking foot.
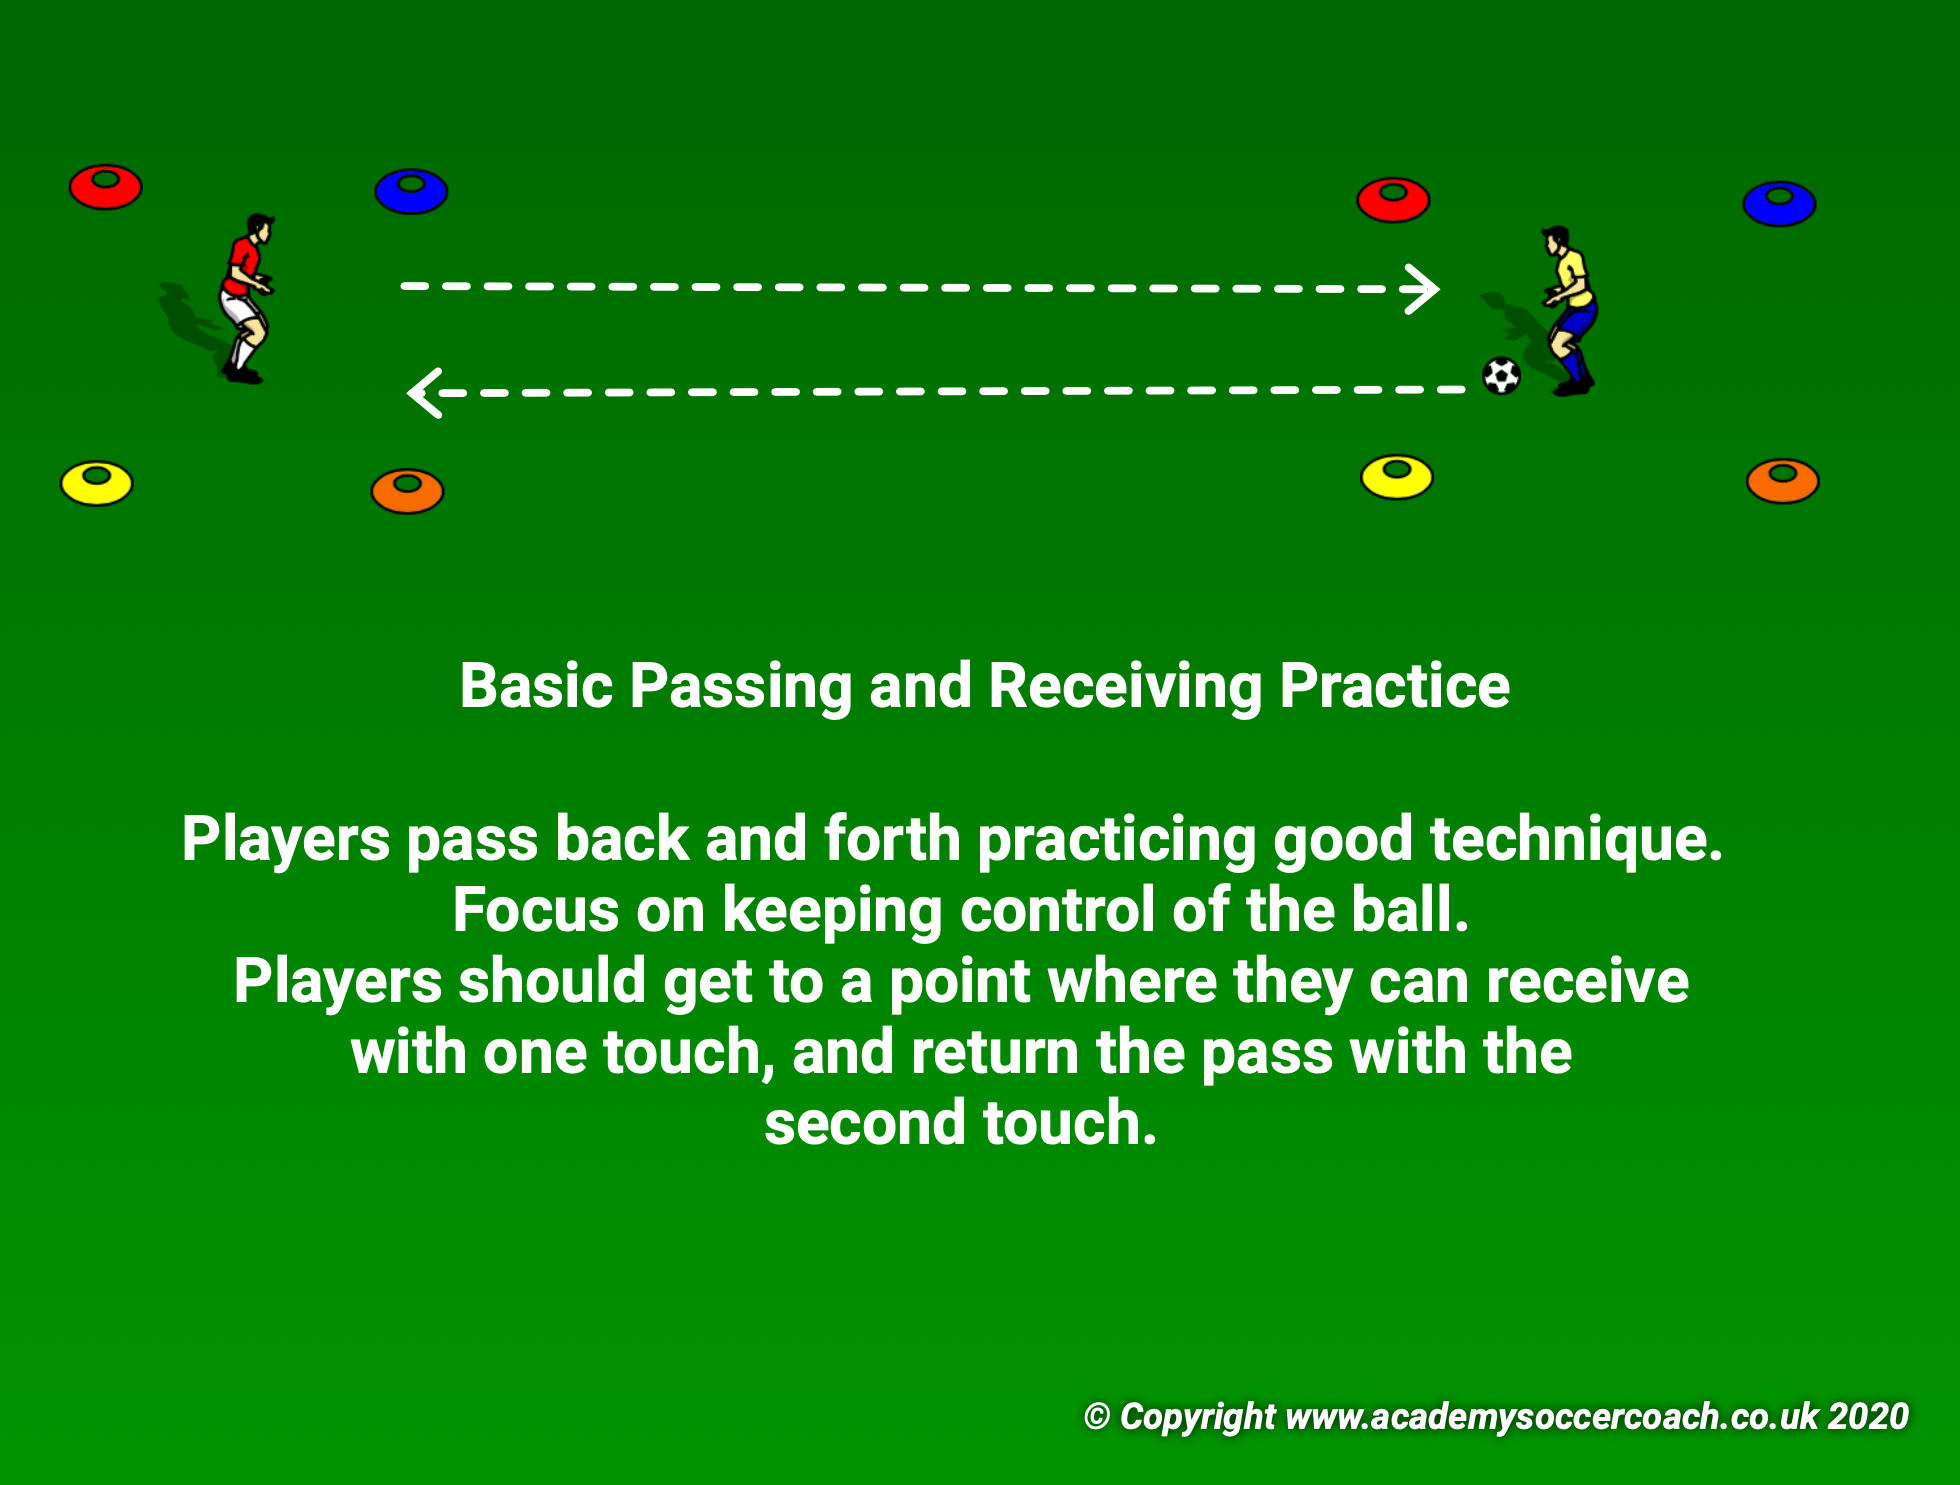
Start by using your squares and having players shoot back and forth toward their partner.
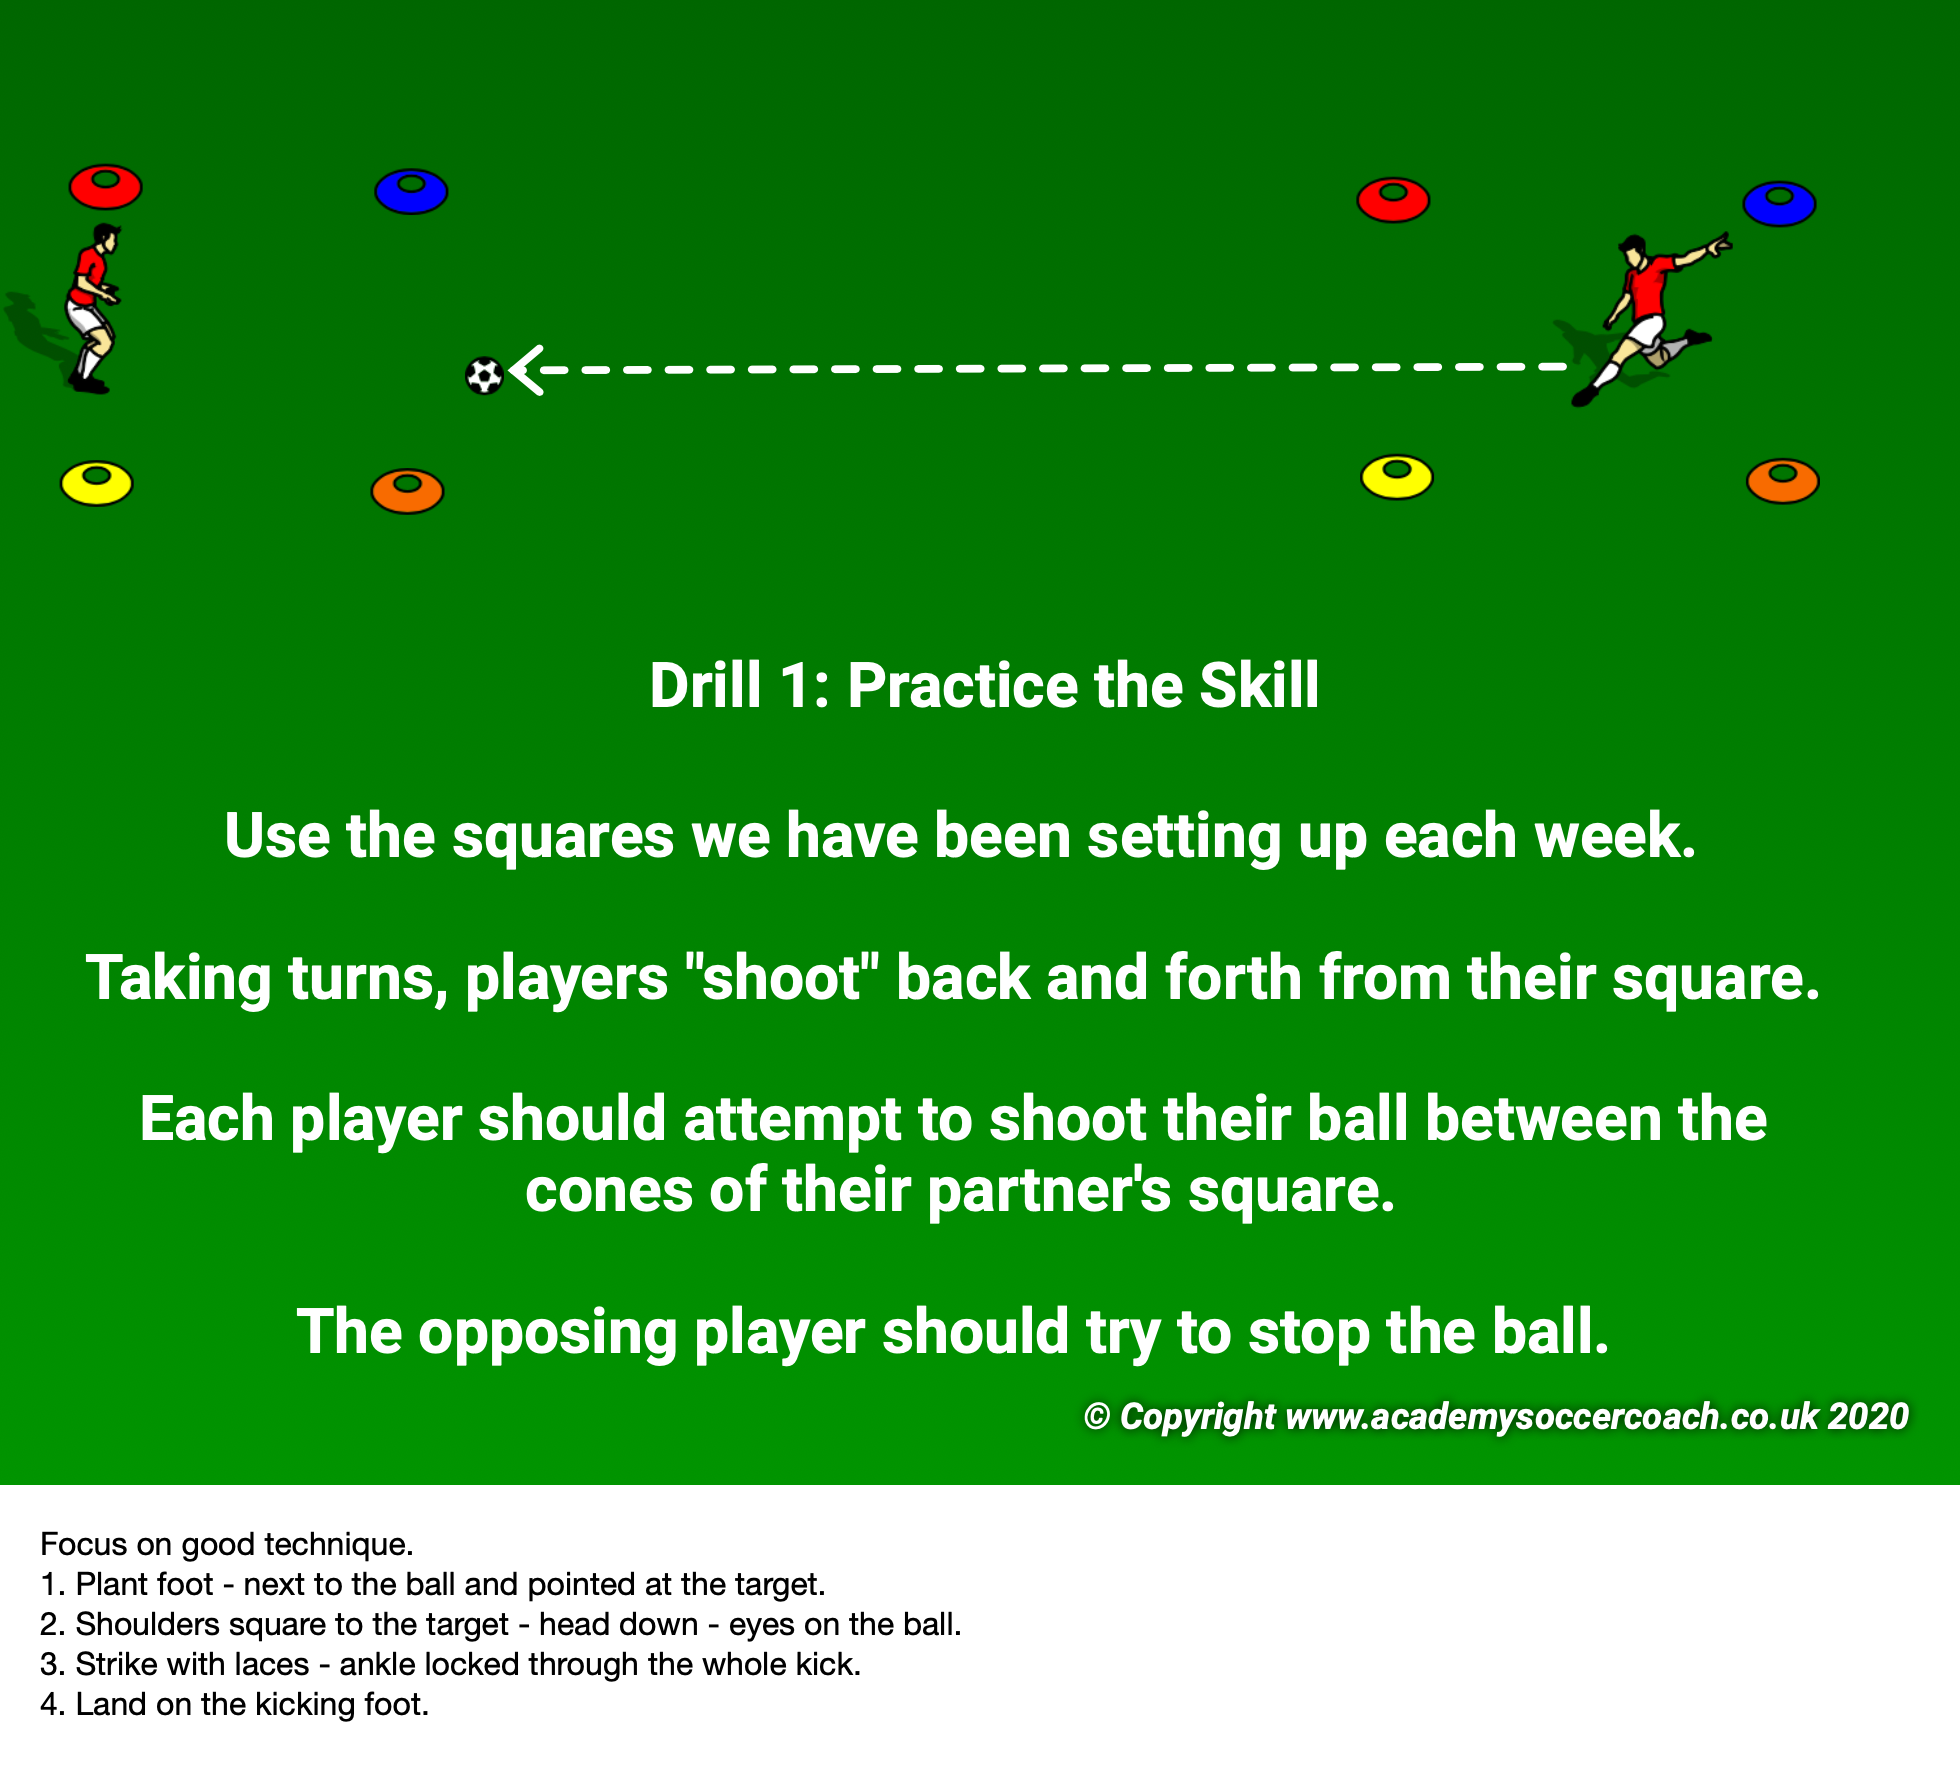
In the following drills please manage the distance of your players by using cones in their lines. Thank you for doing your best to remind players to stay separated from one another.
As you move to shooting on a goal you may want to just allow players to take stationary shots close to the goal. Line them up in three lines and let them take shots trying to focus on the position of their non-shooting foot, the angle of their approach, and striking the ball with their laces. From that you can move to additional drills and games as you see fit. Pay attention to good technique. Shooting a ball is a complicated set of motions and requires a great deal of practice and repetition to fine-tune.
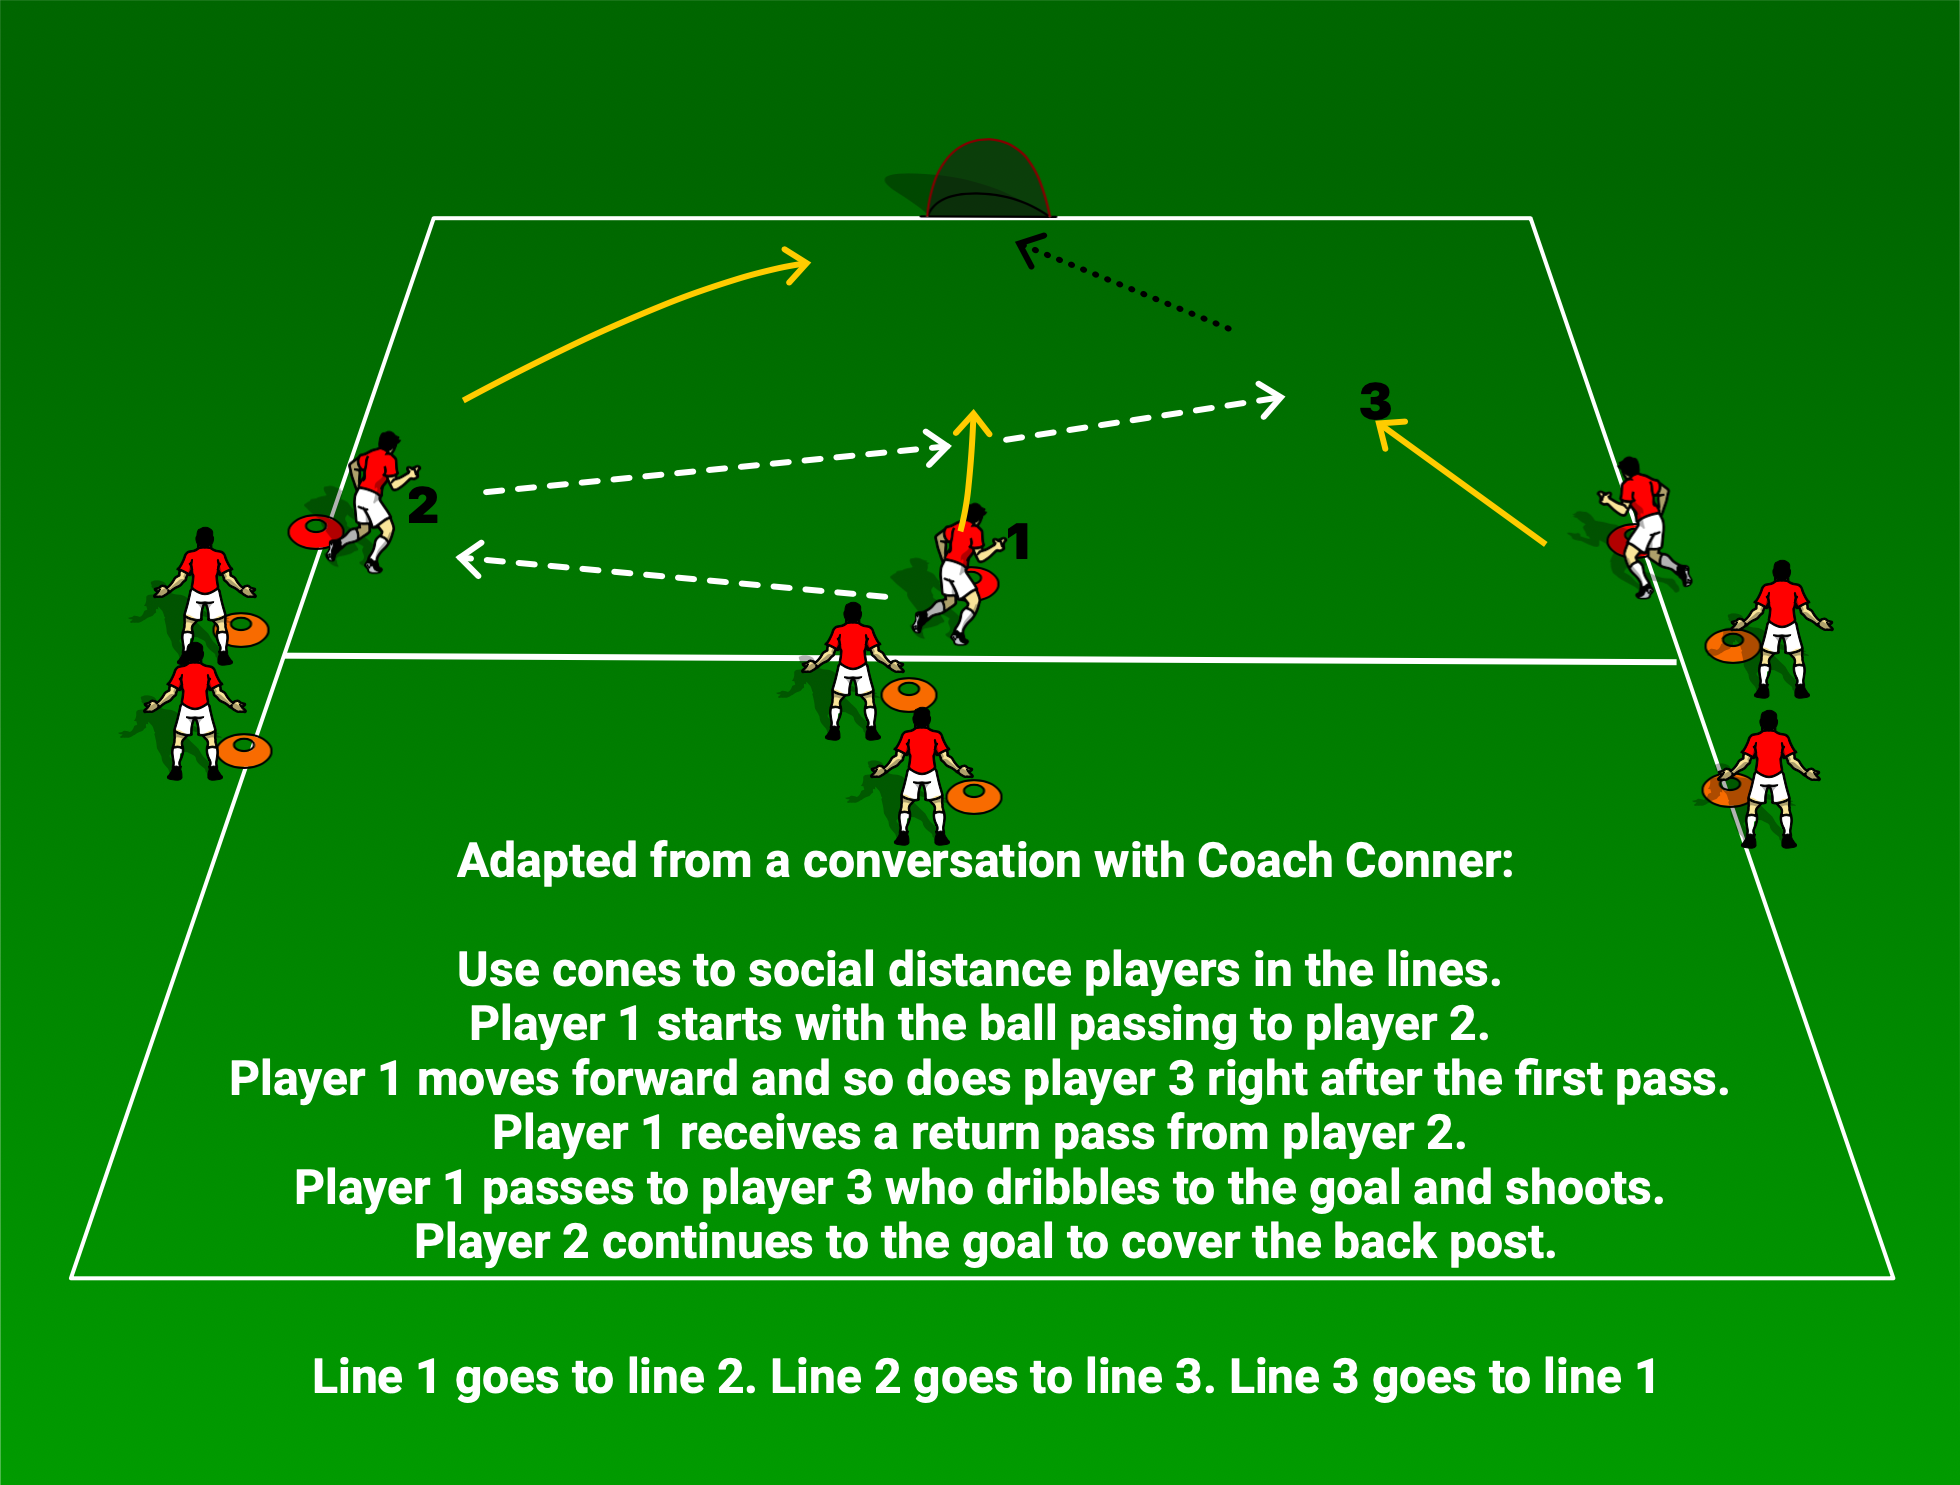
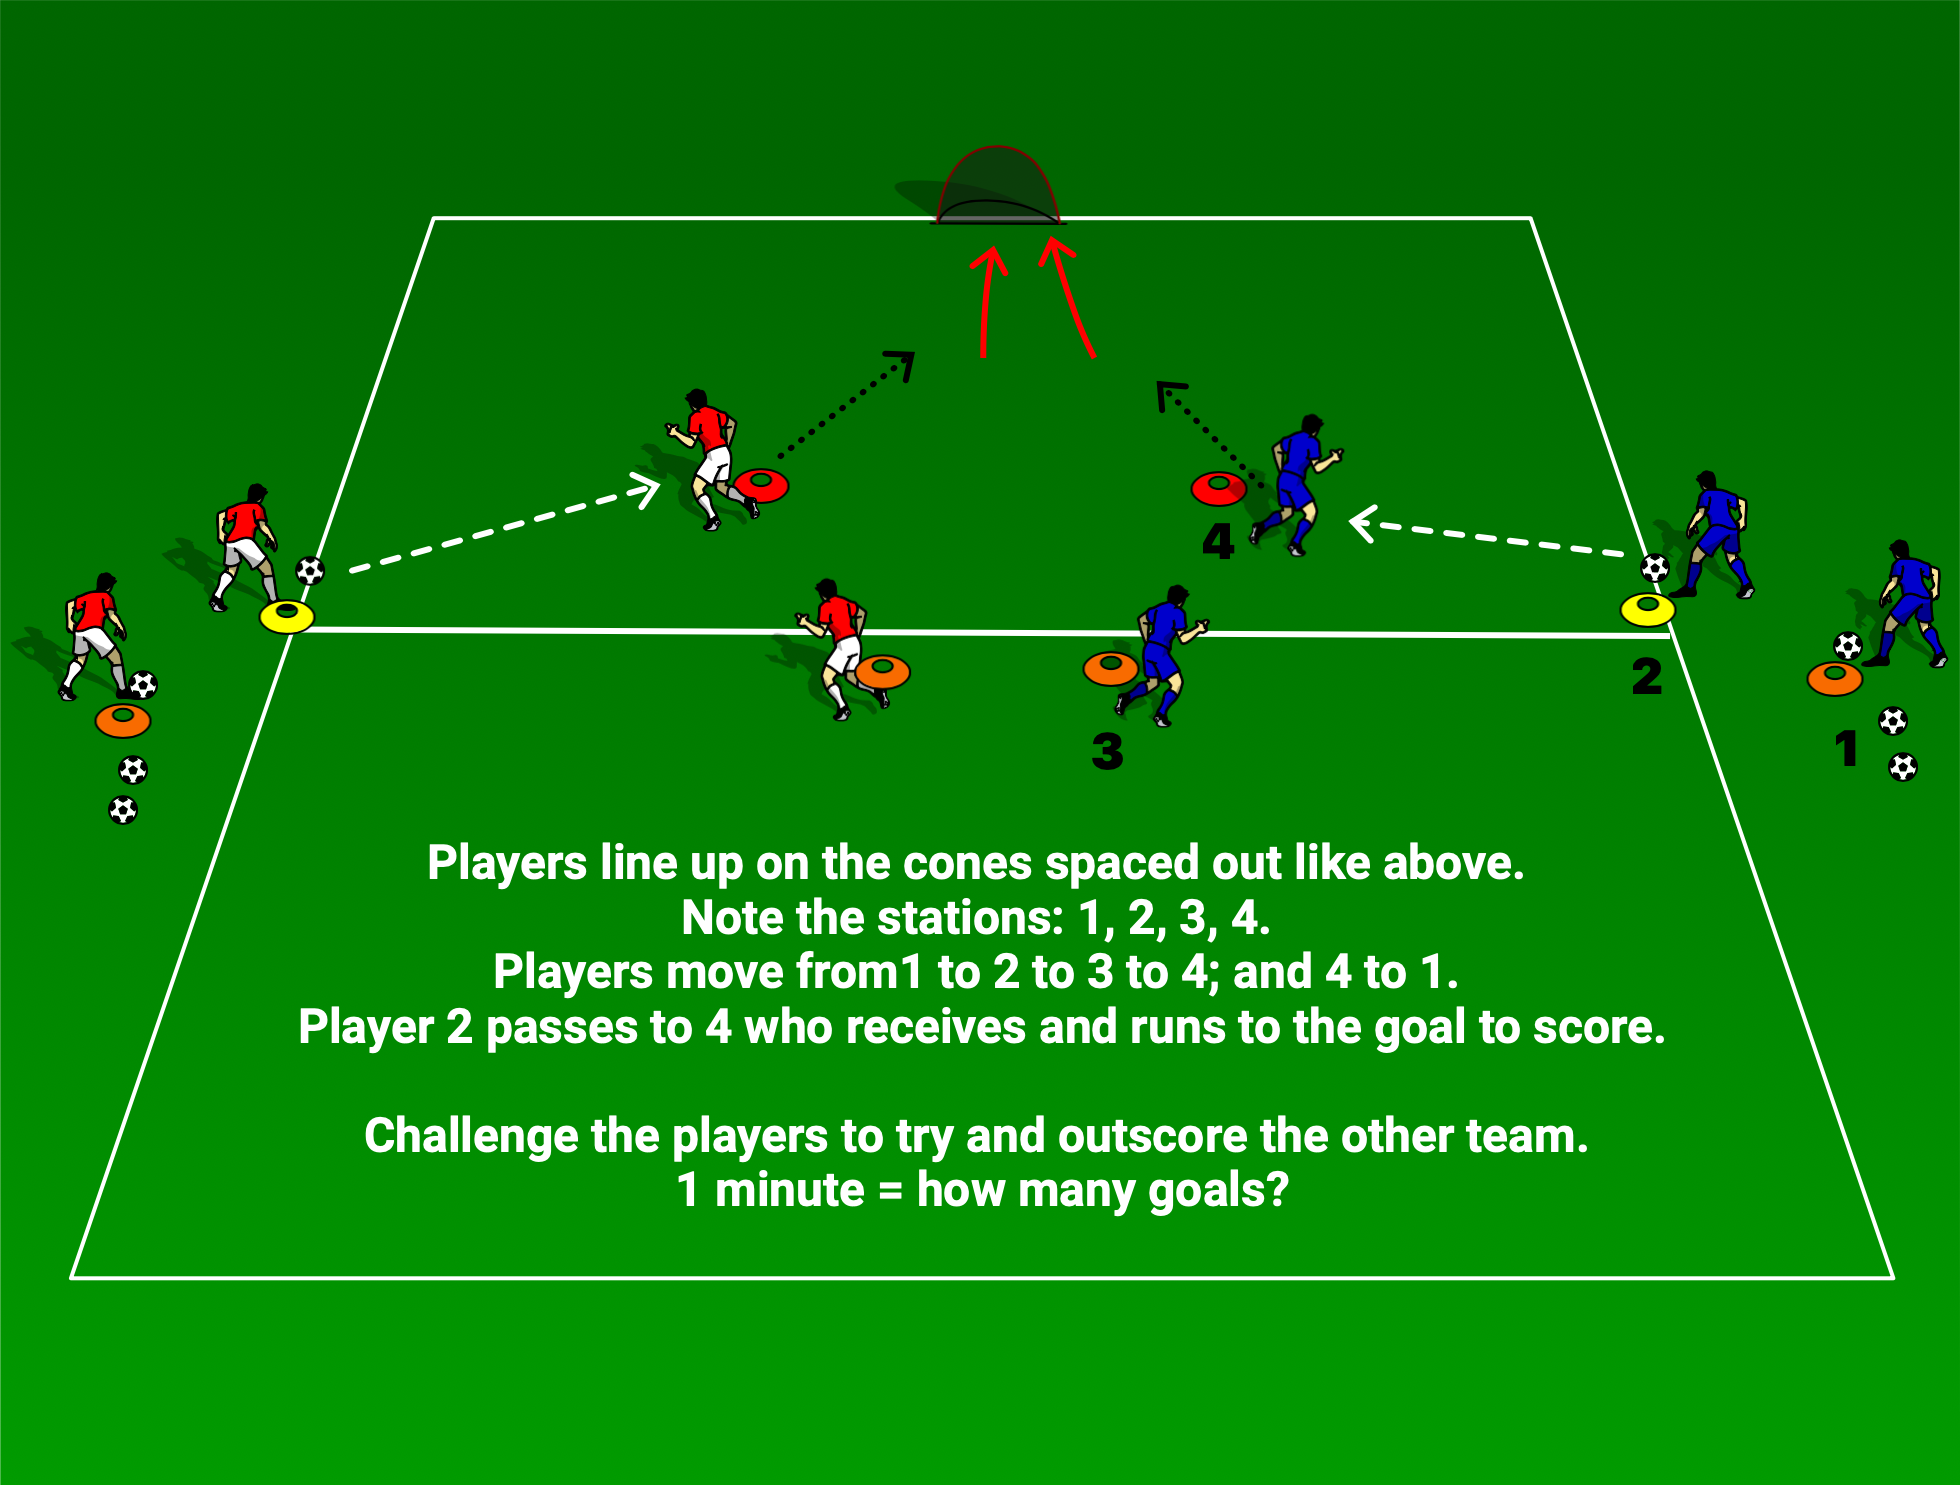
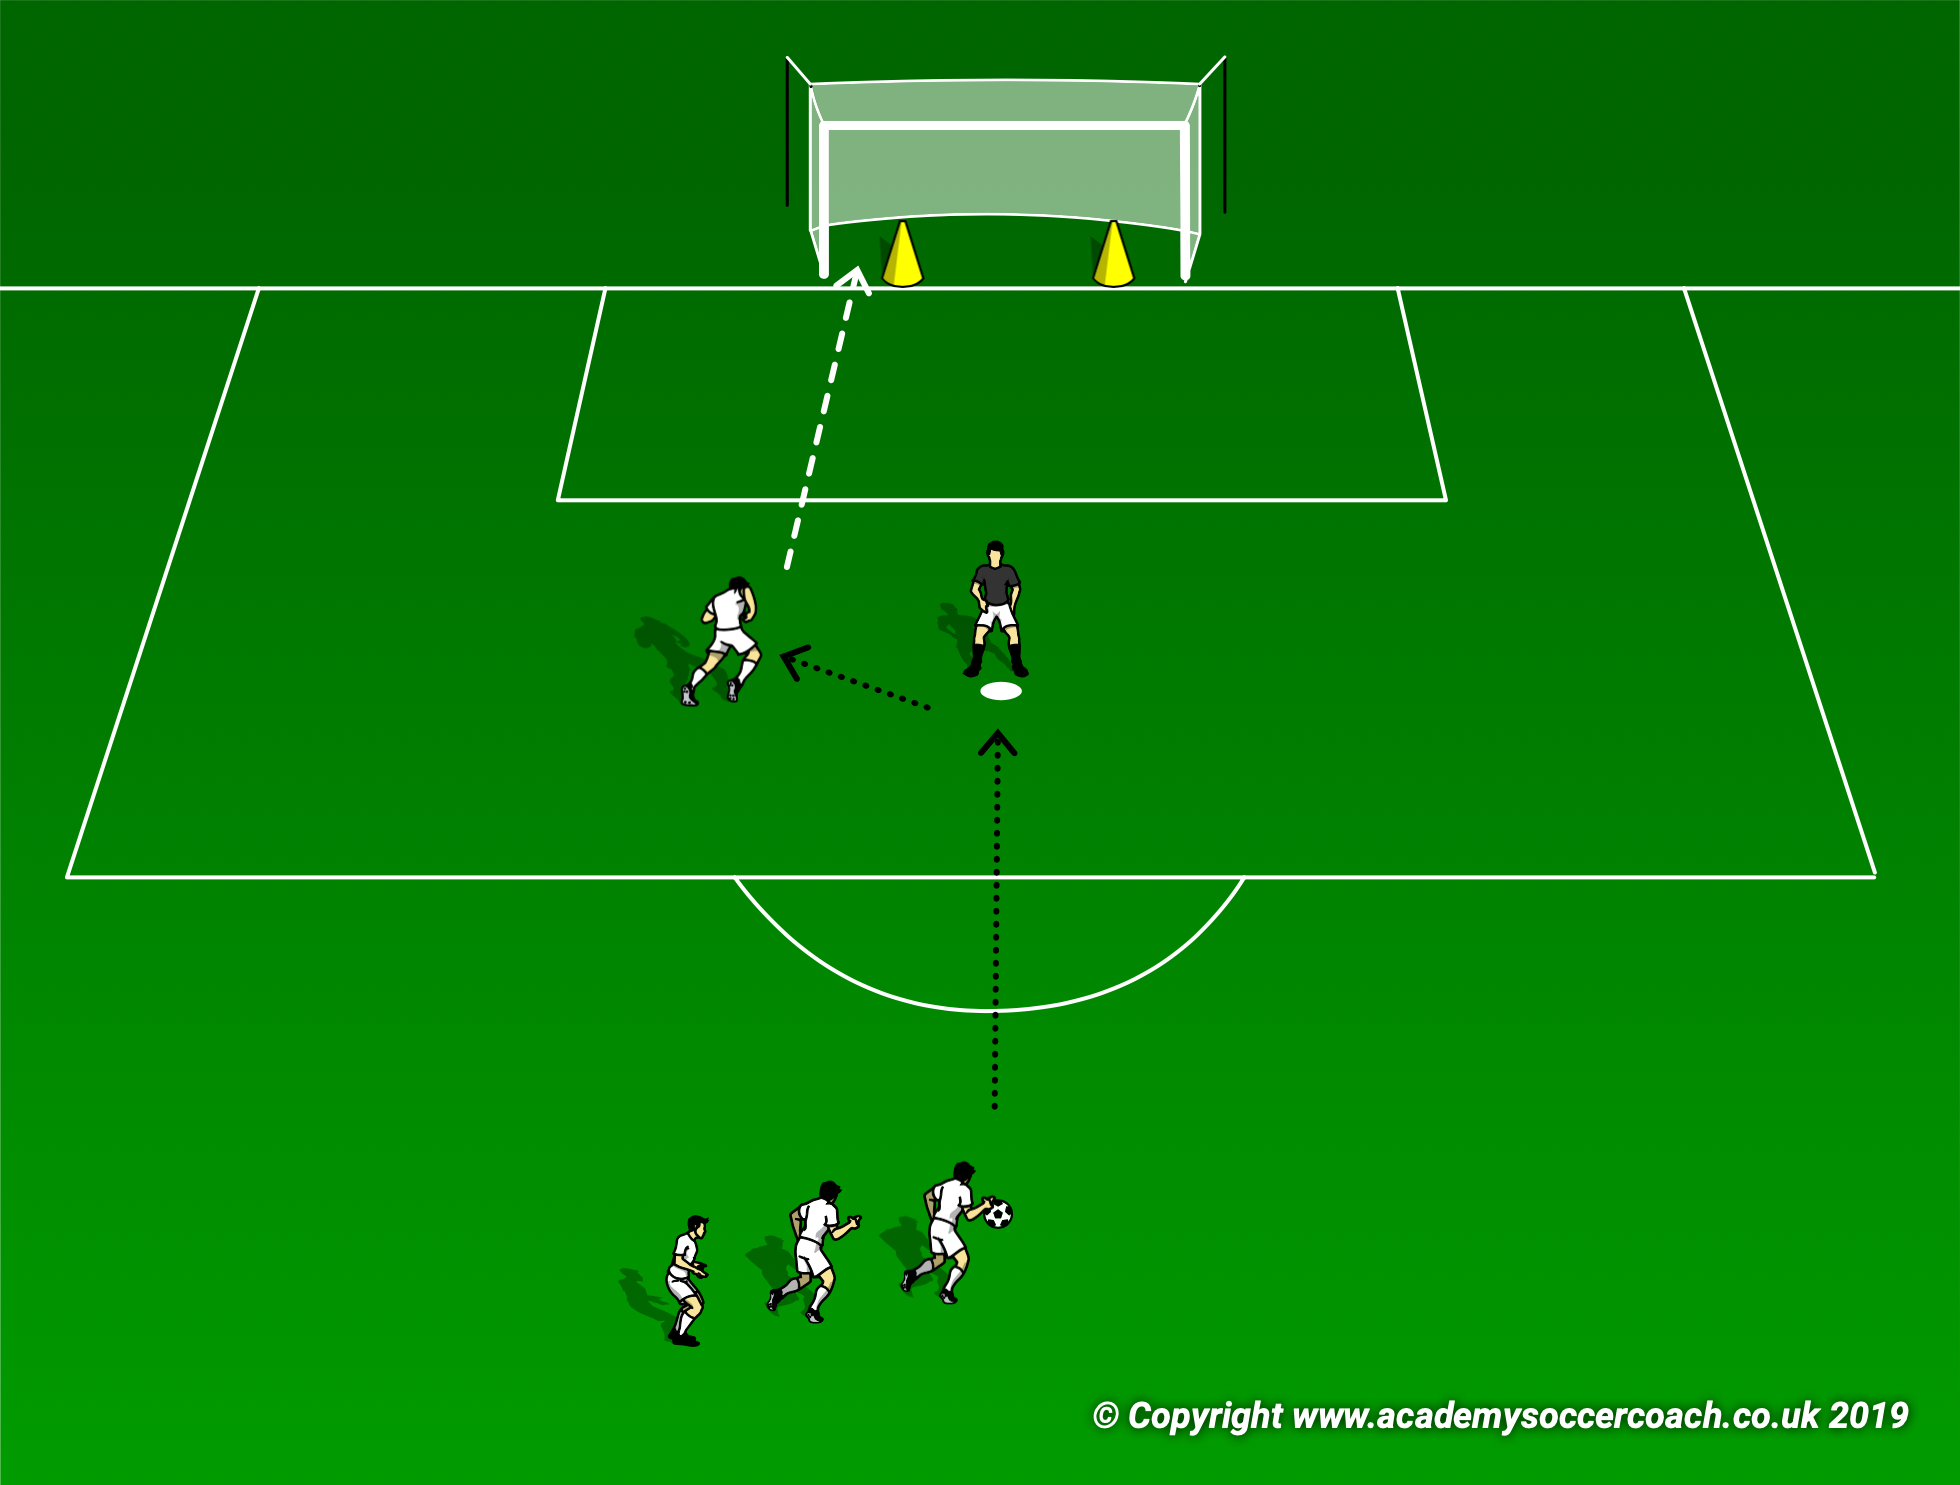 In the first drill players should pass the ball to the coach (in black) and run forward to receive the ball first on their right and then on their left foot. Players should look to take a touch (receive the ball and then shoot using proper technique. Our focus is on getting the form right and not on scoring goals. After they go through this twice to the right and twice to the left add cones 2 steps inside of each post. Ask players to aim for the corners. Give the team a challenge. Can they score 5 goals as a team? 8 goals? 10? Add an additional challenge by adding a goalie or by adding a defender who starts from the right or left post after the first pass.
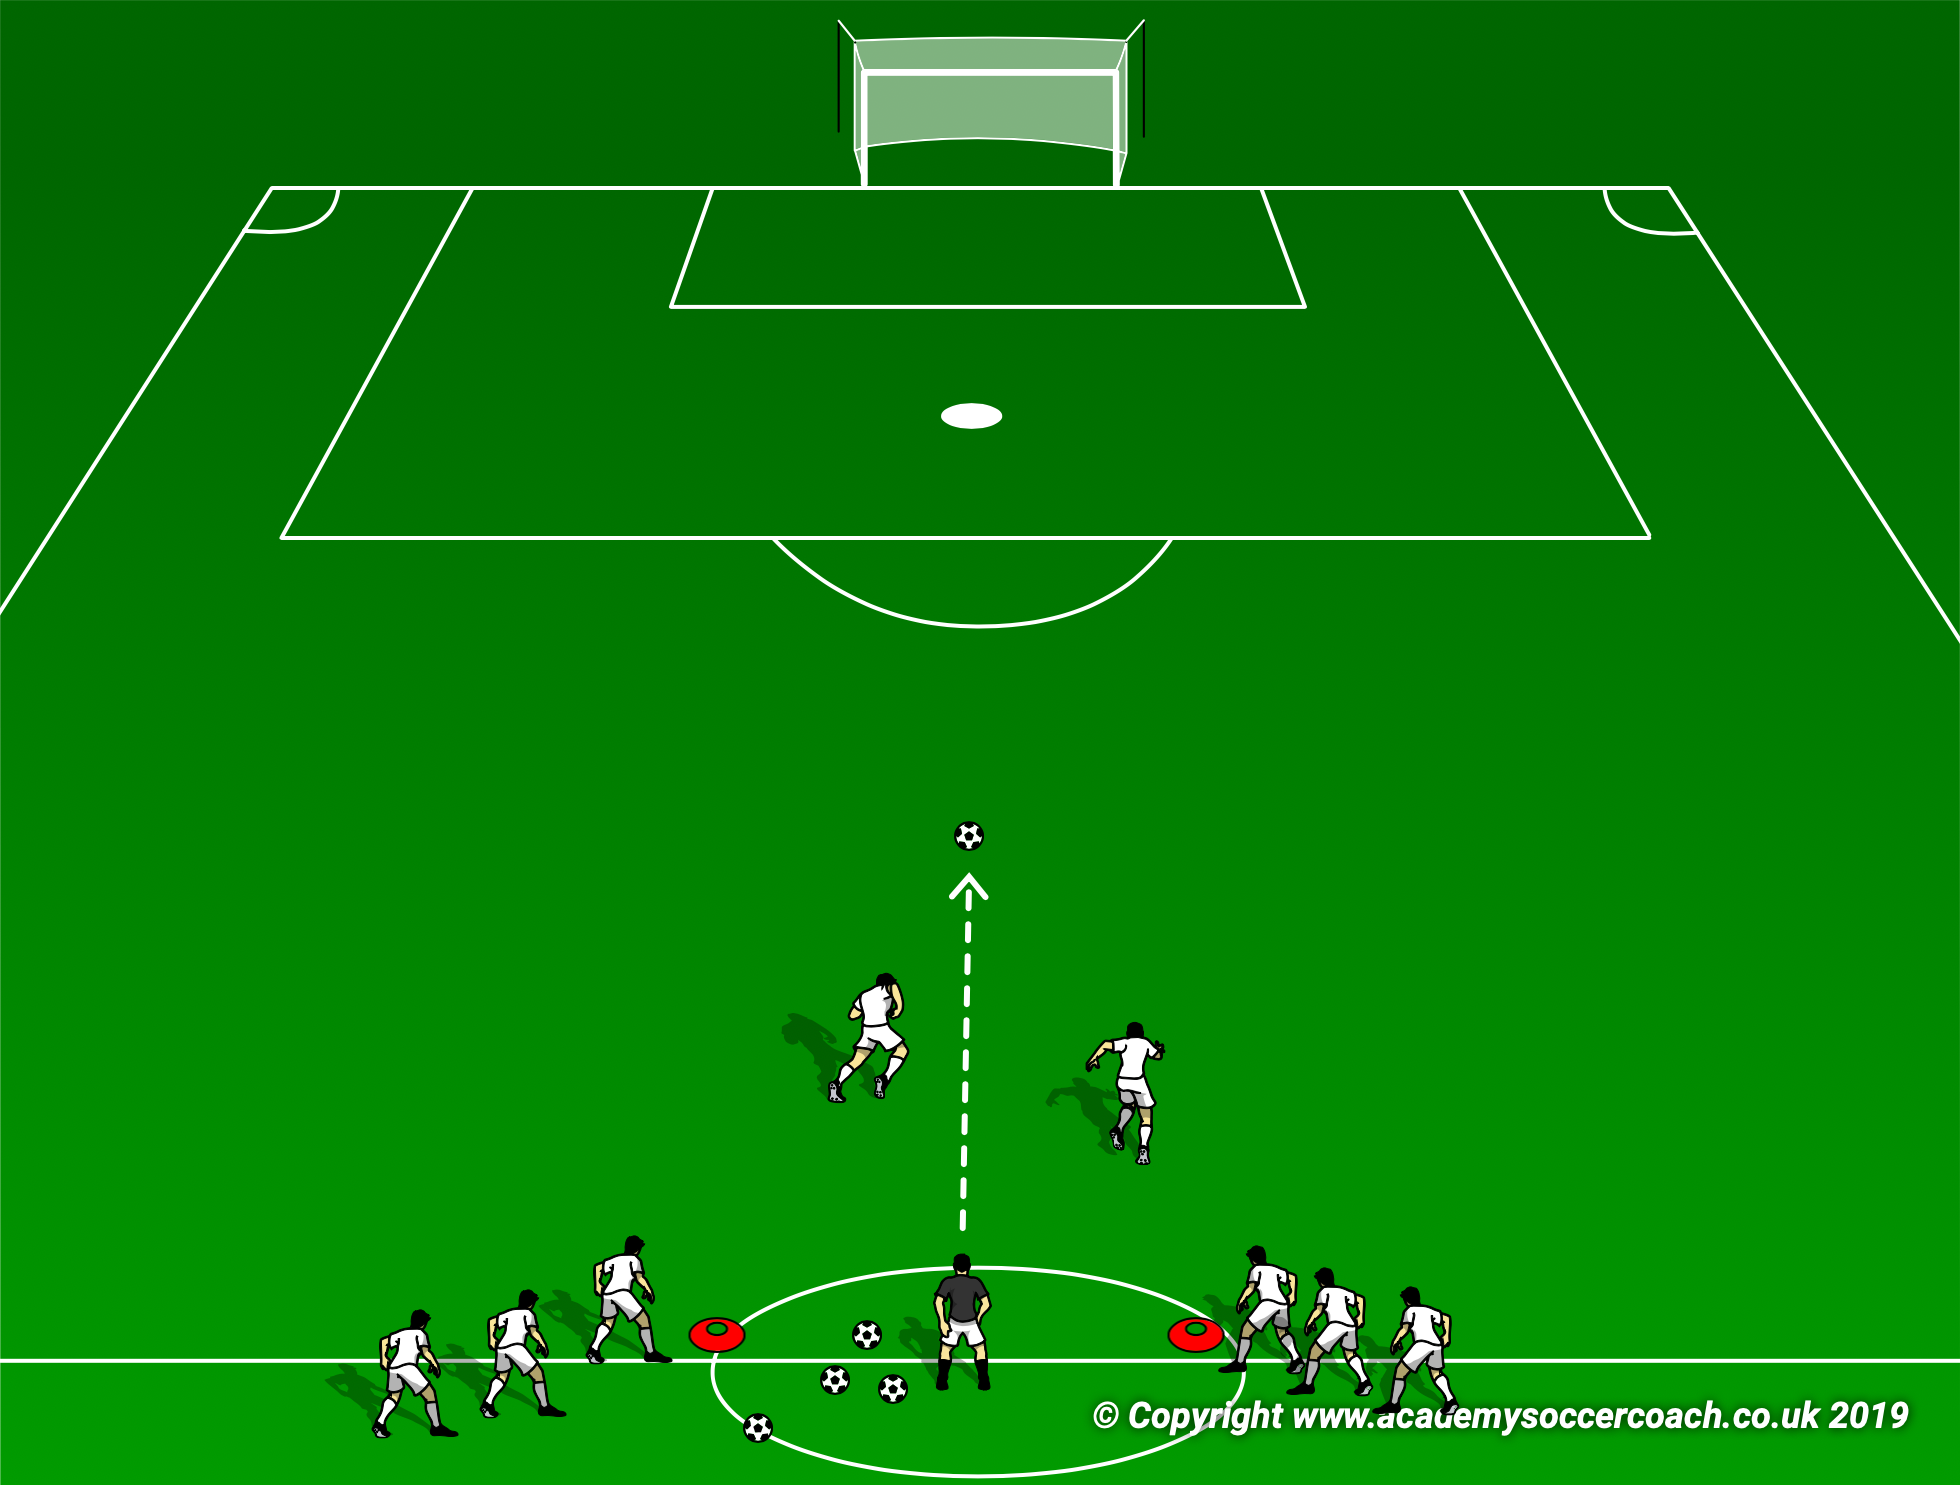
In this second drill players line up in two lines. The coach has balls in the middle but somewhat behind the cones. This allows players to react to the ball better. The coach passes a ball straight forward and players must try to beat each other to the ball. The first person to the ball is the shooter and tries to get to the goal and score. The second person to arrive at the ball is the defender and must give chase. If the defender steals the ball they become the shooter and try to score.
Add variation by sending the passes to the front left or the front right. Players should try to beat their opponent and take a shot.
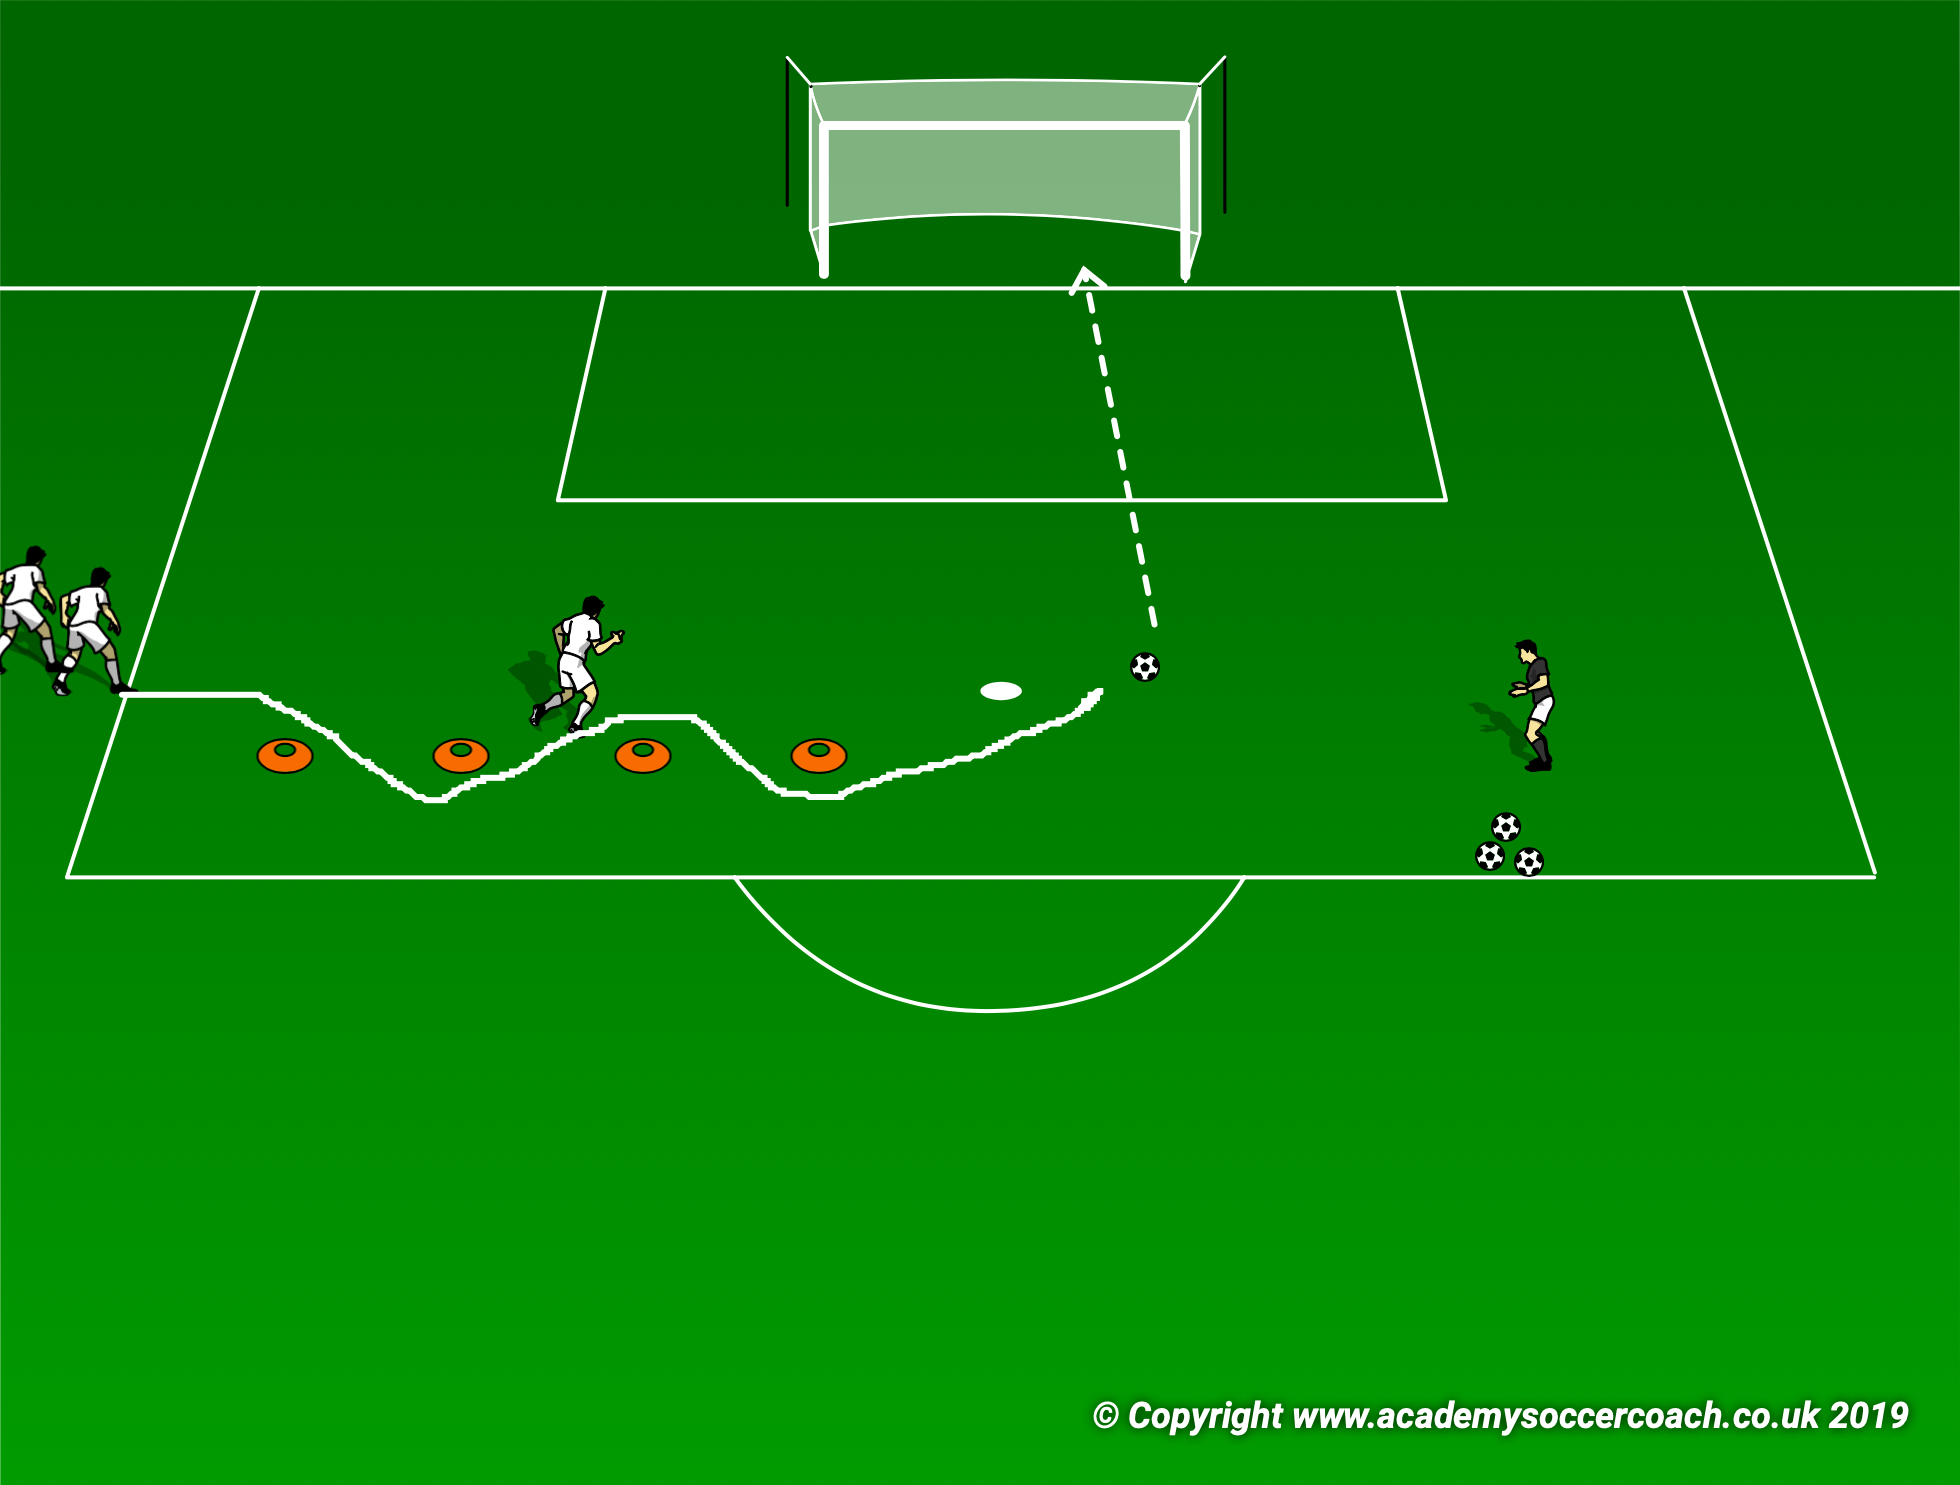
In this drill line up 4 cones just inside the 18 yard box. Players line up at the edge of the box. The coach sets a ball just to the right of the penalty spot. Players run through the cones and at the last cone run to the ball and take a shot.
Once players have done this 2 or 3 times, the coach can add variety by passing the ball into space for the player to shoot off of a pass.
You may also add a defender who runs in from the left or right post, or a goalie if you would like.
Switch sides and run the drill from the right side to work on the left foot.
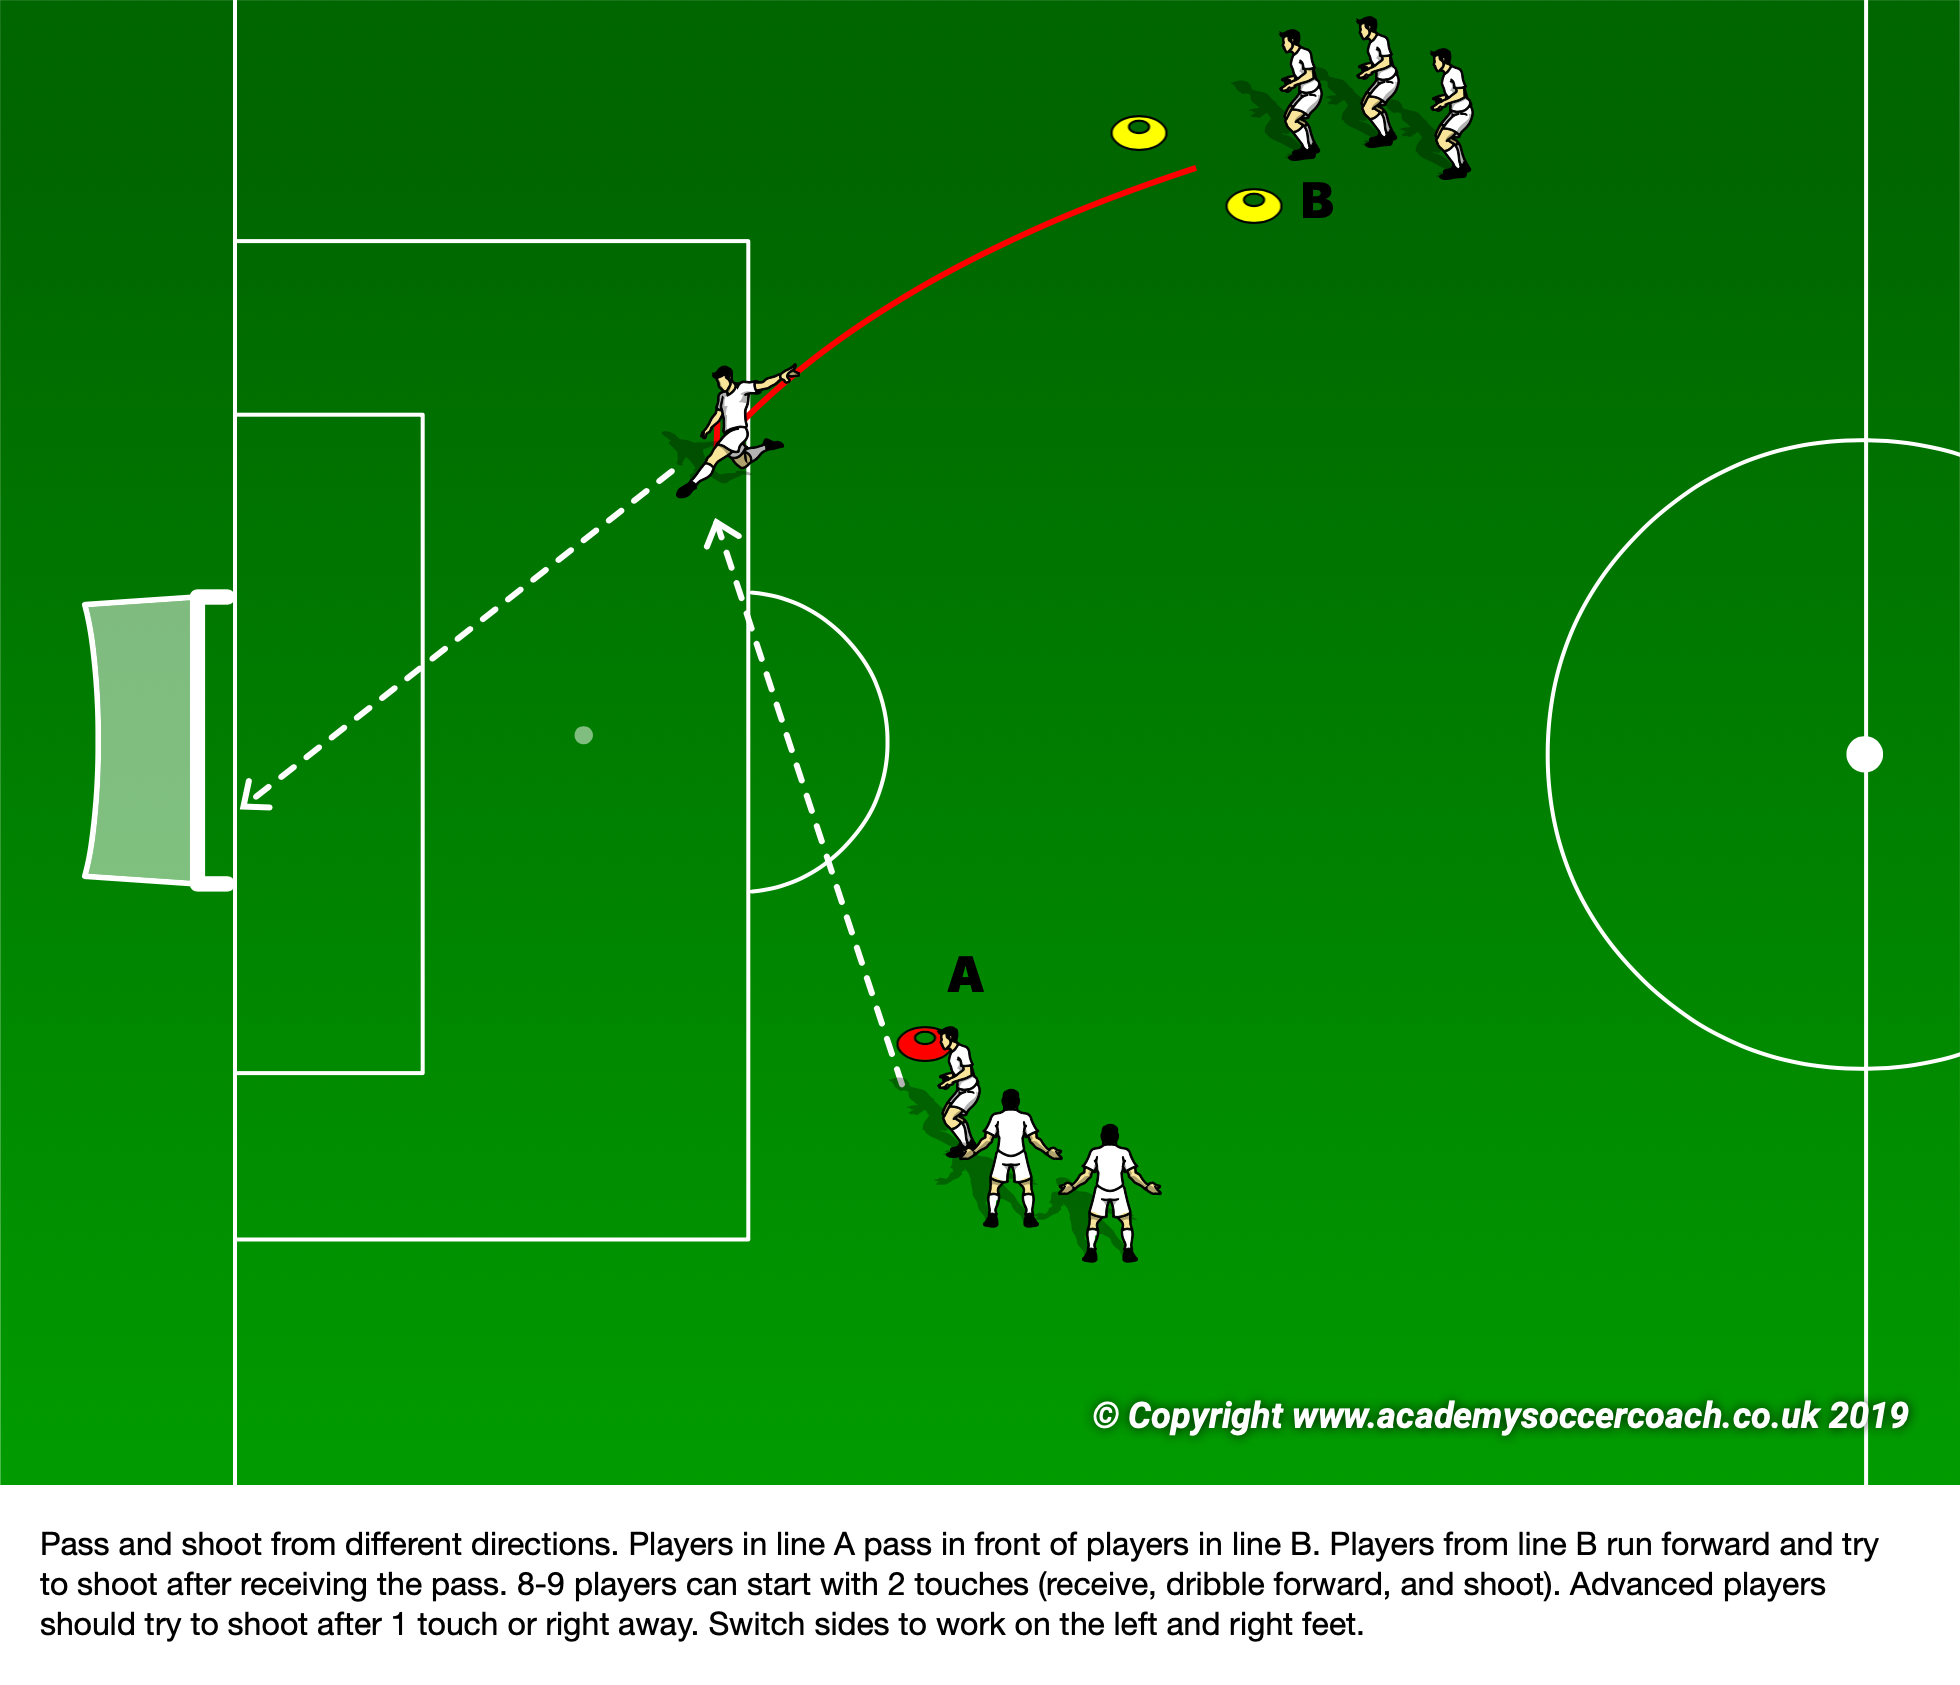
In this drill players line up about 14 steps inside the halfway line, and another group of players line up 8 steps outside of the 18 yard box. Players in line A pass in front of the player in line B. The player in line B should take 1 or 2 touches and then shoot on the goal.
You may add a goalie and/or a defender to increase the challenge.
Receiving the Ball
(Also called trapping or first touch)
To maximize enjoyment of the game there are five major skills that a player needs to know: defending, passing, shooting, dribbling, and receiving. Of these 5 skills receiving (or first touch) is foundational to enabling good dribbling, passing, and shooting. Take a look at this video showing some amazing skill in receiving the ball:
This second video shows some advanced training that one can do to improve the first touch in a variety of situations:
As you can see it is far more than simply stopping the ball. However, I do want to point out that if you have ever coached baseball a few key principles are the same. This should help you remember some of the basics to teach your players.
- Get behind the ball. Just as a shortstop needs to get behind the ball on a grounder so a soccer player needs to position their body behind the ball to receive it well. They shouldn’t be to the side if they can help it.
- Move to the ball, don’t wait. This will take time to teach and repetition.
Here is a video explaining the basic technique to receive a soccer ball. This video is what you should be teaching your players:
DRILLS
Use the passing drills in last week’s practice for receiving. Battle tanks and diamond heist are great drills for this. Please refer to the WEEK 1 and WEEK 2 for those drills. In addition you can use the following:
Technique Practice
Drill 1
Drill 2
Drill 3
Drill 4